Caulking and Exterior Painting - Overland Park
This is week two of a series on how we approach our prep work for homes in Overland Park and Kansas City. Last week, we talked about Tiger Striping and this week we’ll talk about caulking.
Why Caulking
Each week we estimate homes in Overland Park that have thousands of dollars worth of wood rot in need of repair. Water has penetrated to places it shouldn’t and been doing so and sitting there long enough that it is able to rot the wood or engineered wood substrate.
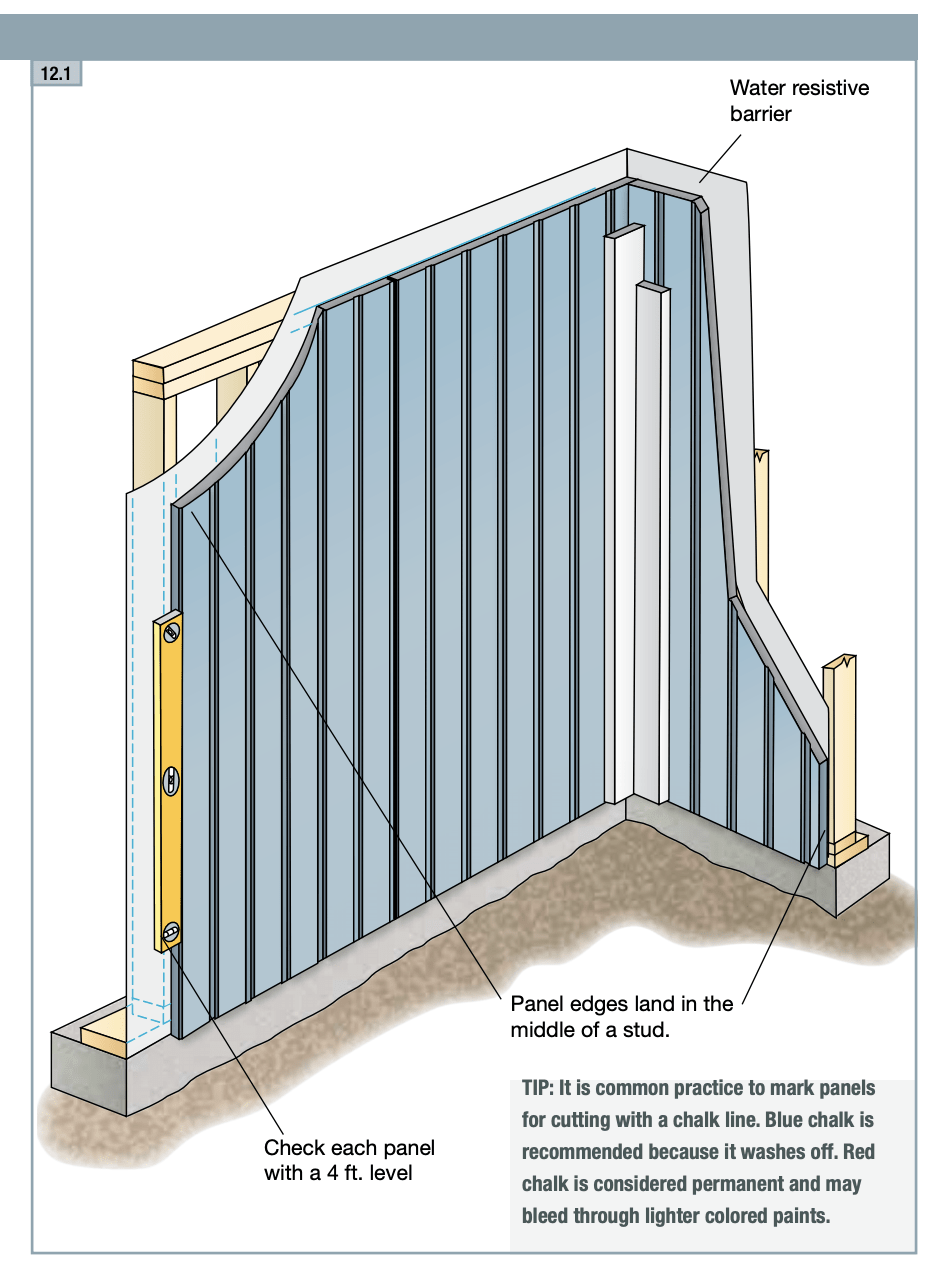
Homes are designed to shed water. If built to spec, the sheating system out should allow most water that penetrates the siding to drain. Check out the best practices guide from James Hardie Siding:
1.  | 2. 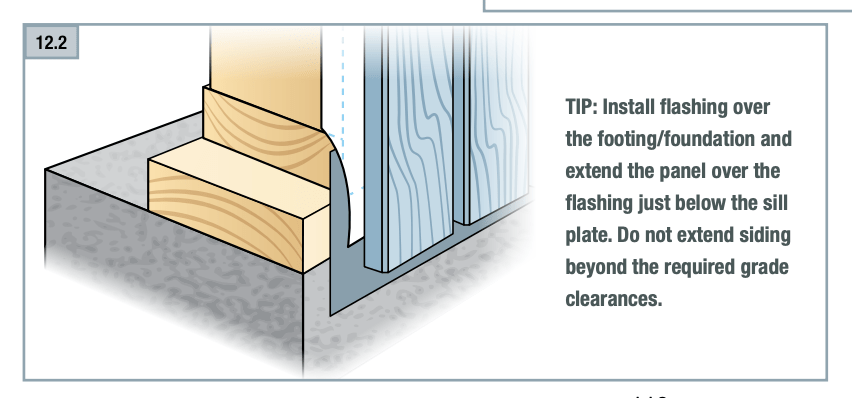 |
|---|---|
3.  | 4. 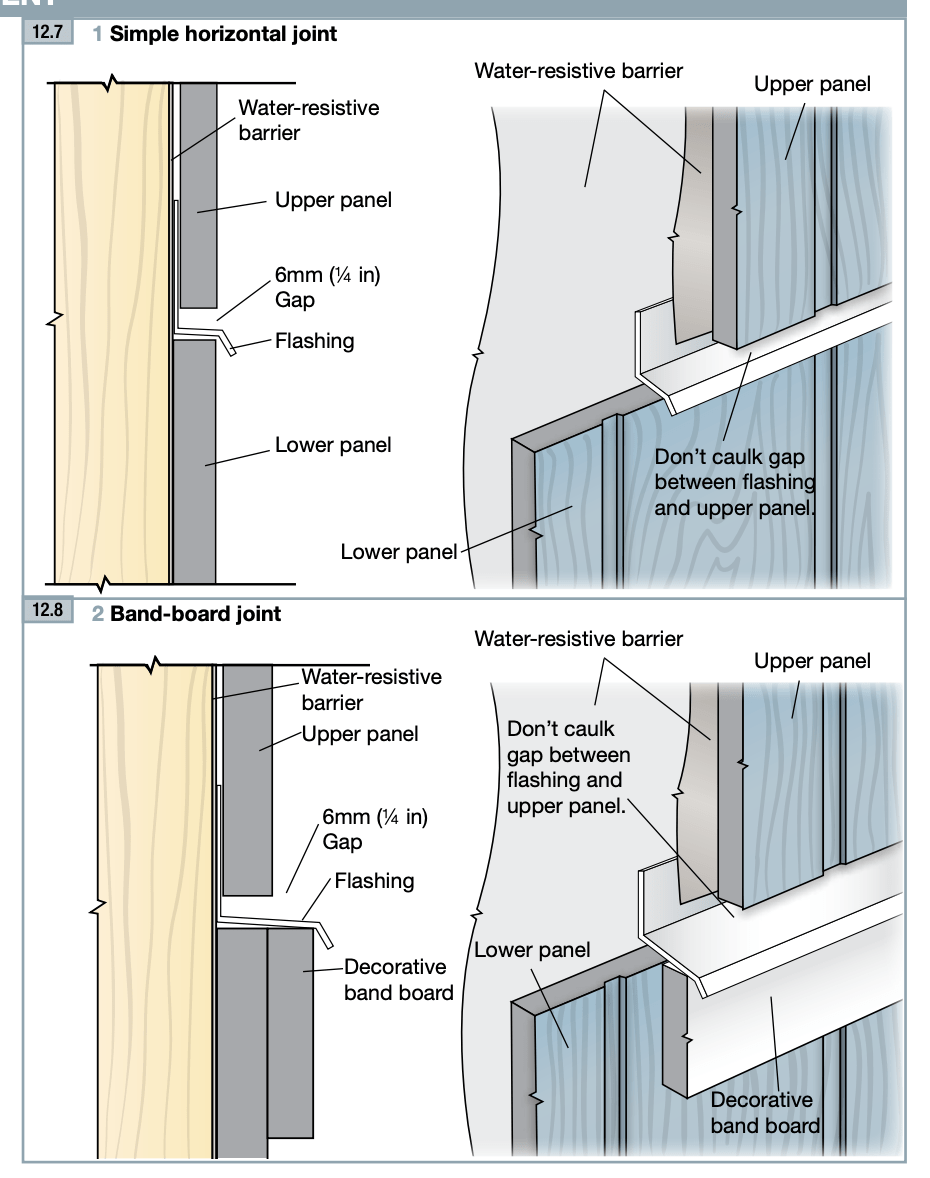 |
5.  | 6. 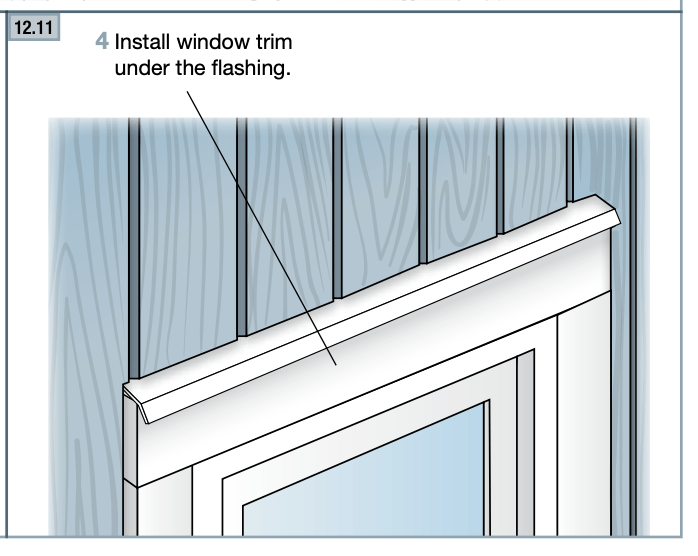 |
Notice that over the framing of the house there is a moisture barrier. The barrier is usually a type of plastic membrane and if any water gets under the siding, the barrier is as far as it gets. It’s slick so that water will slide down it via gravity.
Caulking is a tool that allows us to seal areas where we know there is a high susceptibility to moisture penetration.
Where to Caulk
This is a topic that is opinionated. Depending on what painter you ask, you’ll receive a different answer.
Where to not caulk
We FOR SURE know where we shouldn’t caulk, so let’s start there. We’ve worked on many homes where the caulking someone applied helped to trap water in and cause wood rot! You do not want this.
Notice Picture 2 in the table above. That’s a detail for the bottom edge of the siding panel running along the home’s footer. Notice Hardie details a piece of flashing that is tucked UP UNDER THE MOISTURE BARRIER. They DO NOT detail caulking the bottom edge of the panel. To most in the construction industry, a callout of “do not caulk” on a detail like this isn’t necessary, but some people think the bottom edge needs to be caulked, and we’ve seen cases where painters or other trades caulked it.
Let’s think about what happens if you caulk that bottom edge. Let’s say that water is penetrating somewhere above the bottom edge, perhaps a window trim is incorrectly installed and some water is getting in behind it, getting under the siding, and hitting the moisture barrier. Gravity drains the water down the moisture barrier to the bottom, but the bottom edge is caulked. Where does the water go? See the problem? Caulked the bottom edge creates a “bathtub” that holds the water behind the siding. THIS IS A REALLY BAD IDEA! I write that in all caps because I’m yelling it. This will cause wood rot, not prevent it, and we’ve seen it done on homes. I guess some think they need to caulk everything and some caulk the bottom edges of things not really thinking through what they’re doing.
Ok so don’t caulk the bottom edge of stuff where water might need to drain. Where else shouldn’t we caulk? Generally, we also don’t recommend caulking transitions between two different material types. For instance a stucco to wood / engineered siding transition. This is more of an aesthetic reason that it will cause wood rot reason. The two materials behave differently and expand and contract at different rates. Generally, even if the caulking is very stretchy, it will crack if this transition is caulked and it either requires frequent cut-out-and-re-caulk maintenance or just doesn’t look as nice. If installed correctly these areas are flashed behind the transition, so they are protected underneath and designed to shed water at a lower level.
So lets recap where NOT to caulk:
- Where you prevent gravity from taking moisture away from the house
- bottom edge of siding panels / lap siding / etc…
- joint between fascia and soffit (same thing we want breathability here)
- bottom edge of horizontal trim (cover boards / window trim / etc…)
- ANYWHERE you create a bathtub and hold water in
- Dissimilar material transition
- stucco / wood siding transition
- Where this is proper flashing
- if the joint has metal z-flashing, caulking is not recommended in addition the z-flashing
Where TO caulk
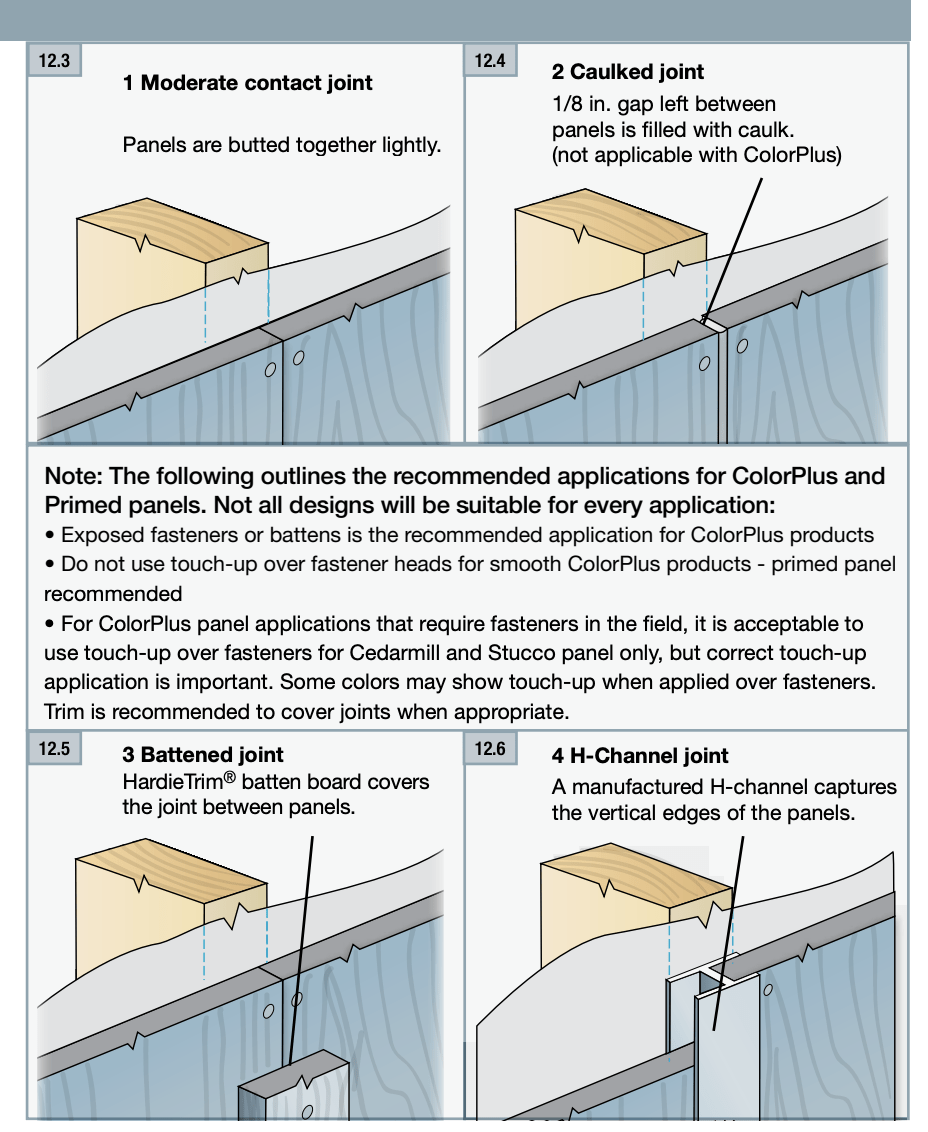
So now that we know where not to caulk, where should we? Notice picture three in the table of Hardie details above. They are showing a butt joint between two 4x8 panels and give several joint treatment options. The second option is a caulked joint. Notice that this joint is vertical. In general, most vertical joints need some caulking.
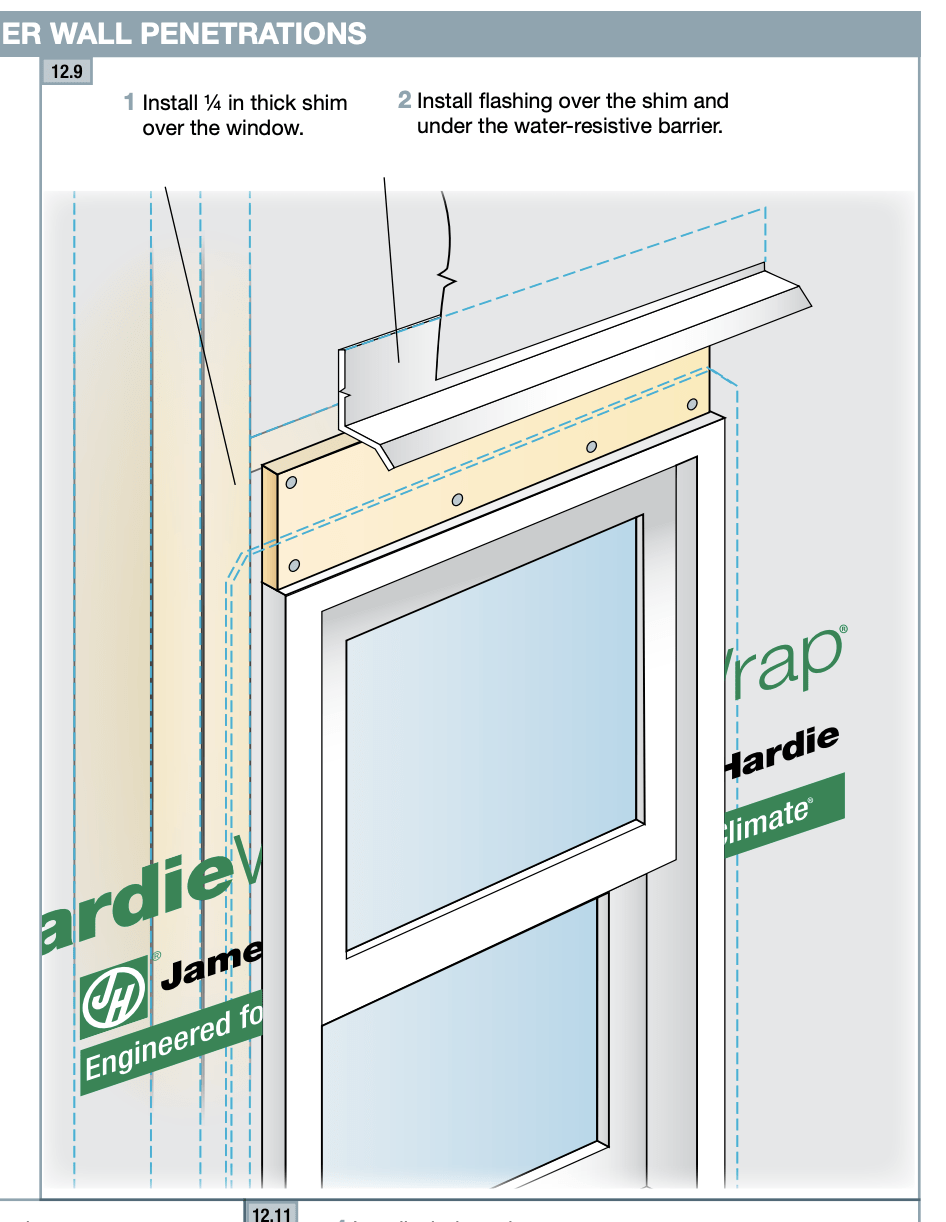
Also the top edge of horizontal trim. Pictures 5 and 6 show a window treatment. Hardie specs using a metal flashing at the top of the window trim to prevent water from getting in behind the siding at that point. On other siding systems, like LP Smart Siding, we typically see these top edges caulked to seal them.
It’s always a good idea to caulk exposed nail heads. Trim butt joints need caulking too.
Lets recap where TO caulk:
- Top edges of horizontals (trim typically)
- Nail heads
- Butt joints between panels, lap, etc…
- Edges of window and door trim (not bottom edge)
Caulking Types
This is pretty simple. There is cheap caulking and there’s less cheap caulking. The cheap stuff is $1 or less per tube and it is less flexible. If there is significant movement in the caulked joint, this caulking will pull away from the edges or crack out. Cheap caulking tends to also get brittle and crack out quicker than it’s more expensive counterparts.
Is cheap caulking bad? Bad isn’t the right classification. It requires more maintenance in shorter intervals. Means: you’ll have to check and re-apply more often.
Good caulking is normally $2-$4 per tube and can be extremely stretchy. We use a couple from Sherwin Williams primarily (SherMax and MaxFlex) and both perform exceptionally. Our opinion is that if you’re going to have your home painted with high quality exterior paint, why in the world would you use a low performance caulking? SherMax or MaxFlex and most expinsive caulkings hold up for the life of the paint. We recommend our customers look over the house and check the caulking every 8 to 10 years (which is about the life on average of a paint project). Even the expensive caulks can crack with age and need addressed.
Summary
Hopefully this gives you an idea of how we think about caulking. It’s an effective tool if used correctly and a tool that can cause damage if used incorrectly. Of course if you’re working with us and have questions, talk to our estimator or your Project Manager and we can make sure and answer any questions you’ve got!